Sculpting and Casting a Resin Statue
Using Sculpey, Armature Wire, Acid‑Etched Brass and Rubber Molds
Chapter 7: Head Sculpting and Emergency Molding
From the previous chapter:
Much of mold-making is thinking like a liquid and at several stages of the process! First you have to “see” the end product, which in this case is the mold standing upright.
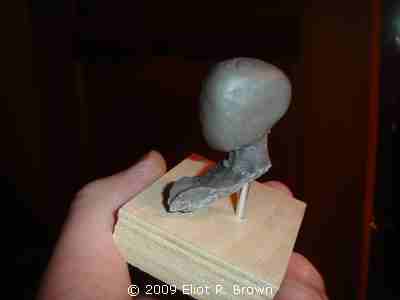
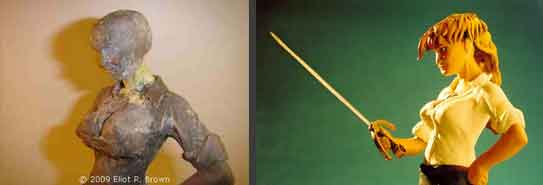
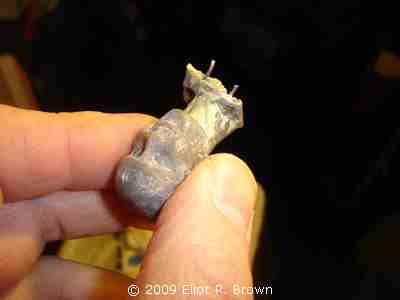
This was the humble beginning. I spent a lot of time fooling around with that head. Ultimately, I did not like it and started over. But I'd learned a bit from the first time. The following pix are the second head. I have shown them in the order they were taken. A lot changed over time, but it was maddeningly slow.


On the left you can see I have marked the head for sawing. This was to be the back half of the “wig.” On the right I had to repair the head and used some Milliput standard putty. Great stuff-- water-smooths, takes over an hour to set, works like a dream.
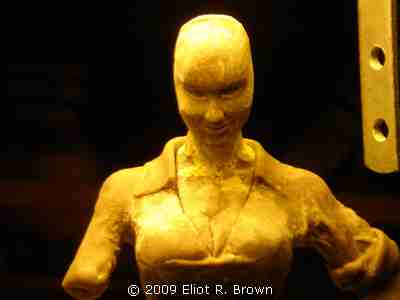
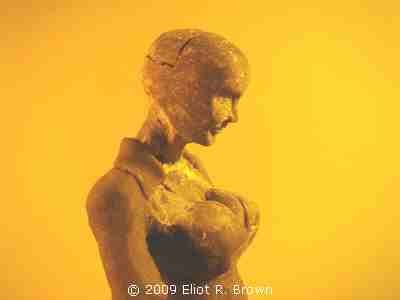
The strange lightingthat piece of hardware is from a busted old lamp just above frameis to help me see proportions and balance. At this point, I was slicing away hair-thin shavings of face here and there to get the finely-boned beauty I felt was lurking within! I used a fresh #11 X-Acto blade.
The eyes are nothing much to write home about. I used an old Roman statuary device, which is to carve the eyelids and leave the pupils and irises off. This was pretty small and most people would paint them in. One detail was to dig in to either side of the eyeball. This suggested depth and a certain vitality.
Ears! I was planning on attaching the ears to the skull, but that didn't work out too well. They probably would not have molded and cast up too well, either. Eventually, they were a separate item to be applied before the “wig.”
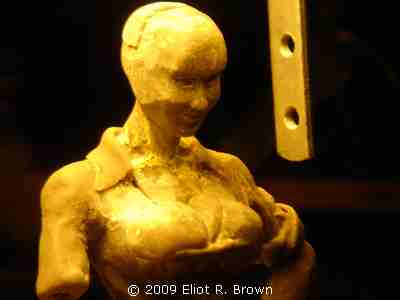
Need I sayroyal pain in the neck? The cleavage snapped off but I was determined to keep this going. So I drilled tight-fitting-pins in the base (shown) and loose-fitting holes in the cleavage side. This would eliminate the need to have perfectly aligned holes and pins between two irregularly shaped objects. Then I used gap-filling CA glue so as to have the time to let the parts find their own alignment.
With additional handling, this was not going to last. I decided to go straight to casting the head with cleavage now.
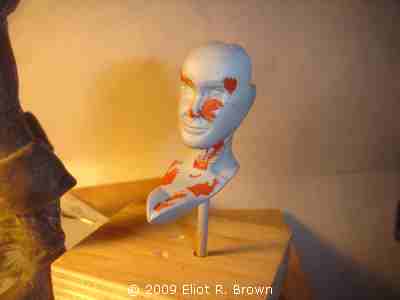
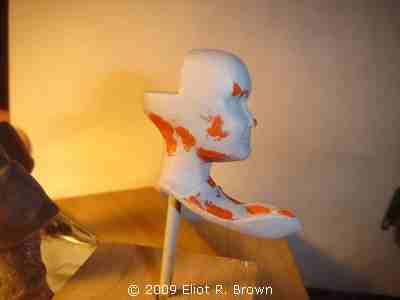
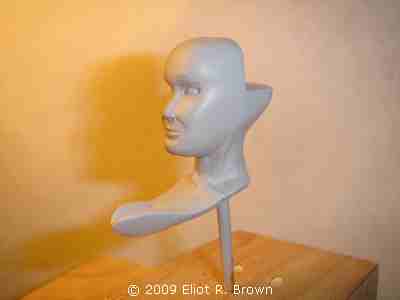
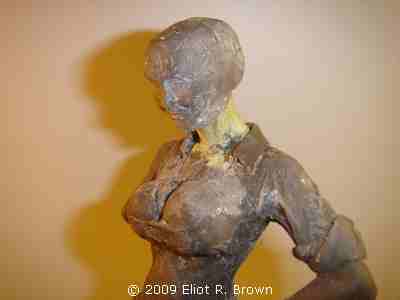
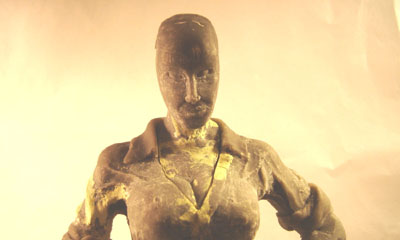
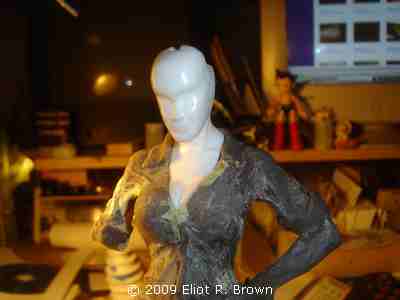
In these four head shots, you can see I built a little stand so I could spray paint her and work on her. This is ordinary light gray primer. I use DupliColor spray paints made for auto body repair. I follow the instructions and get pretty good results. It is important to start spraying while pointing somewhere off of the model, then move over it. Several light build-ups of paint then stop.
Primer is good for all sorts of reasons. Most have to do with filling in small scratches, but the big one is to provide an even surface that will reveal flaws. Flaws of all kinds, from lumps and bumps, big scratches and discontinuities to allowing you to see the entire shape for the first time.
The red stuff is, again, auto body spot glazing putty made by Dynotron. It looks, acts and smells just like Squadron Putty and it just might be the same. But you get twice as much for half as much money.
The best reason to use materials intended for auto body work is that they are differently priced than quite similar materials for model makers. Also, they are formulated for quick drying. That allows you to spray or putty and then work on something within 15 minutes. This is very handy for something like the above. Within an hour, you can cycle through priming, sanding, puttying and priming several times. It can be very satisfying.
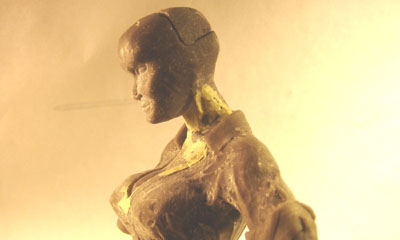
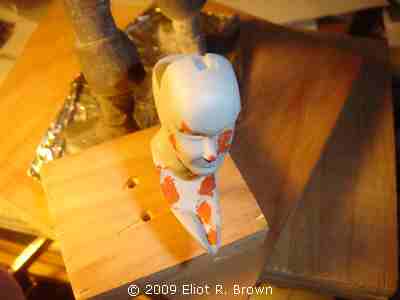
I wanted the forehead to be proud and broad, indicating intelligence and maybe she’s a little too smart But I liked the overall look and this was the big step to getting started on her hair, which would cover a multitude of sins! Let’s get that head into rubber.

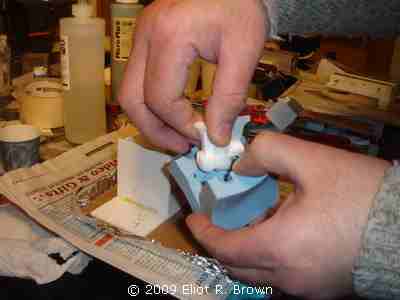
This requires a bit of explanation. The head needed a “pour stub” which would appear in the rubber mold as a hole in which to pour resin. It also needed a vent to let bubbles escape. This “fin” would do that. These items had to be in a place where either no one would see it, or it could be sanded easily. (That’s a preference but sometimes a rough seam is unavoidable.) Since I've gone into all the mold planning and material specifics for the sword, I'll skip it here. This is a little guy, so let’s just get it done.
But there is one thing to mention — the brass tubes. My plan was to submerge the head in rubber and gently cut and tear the rubber to release the master and, ultimately, the cast resin. To get the pieces to re-align perfectly I drilled holes through both sides of the mold box and placed brass tubes through the box. I did this despite having the mold box to hold them, because I had to take out one side of the box to get the rubber out. Thus I could not guarantee that the box would reassemble just as it came apart. But the brass rods would help. (I got this idea from Captain Cardboard, not better known as Scott Alexander, who apparently was a Hollywood special effects modeler though he doesn't talk much about his history. His extraordinary work can be seen:
http://atomiccity.yuku.com/
His site is set up in categories that have been well-trod by those of us familiar with this on-going story. The Good Captain broke on the “garage kit modeling” scene by making the first super accurate and nicely-sized one-man pod from “2001: A Space Odyssey.” He went on to shock us all by offering an 11 foot (!) “studio scale” replica of the primary space ship from that movie, The Discovery. In addition, he was able to make a “half-scale” version of that model as well as most of the 2001 craft and ships. If that weren't enough, he went on to develop a huge scaled, “real space” Mercury capsule.)
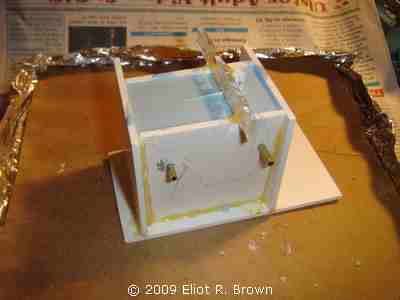
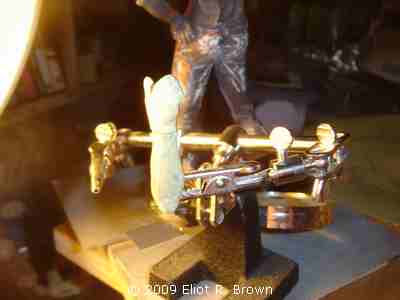
I hot-melted the mold box together out of scrap styrene. You can see the brass tubes that run through the box and rubber. You can see a sketch of the head piece so that I could make sure it went where it was supposed to. On top is a length of scrap acrylic stock that I hot-melted the head’s pour stub to and then melted it to the box.
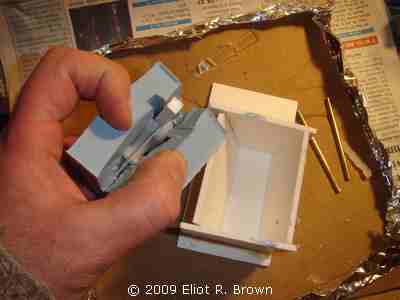
She’s in there! You can also see that I purposefully tilted the sides of the box, not just to save on rubber, but to help orient the rubber to the box. If you can do a little thing that helps prevent fumbling around later, it’s to the good.
First head and it’s nearly perfect.
Now Astro-Boy is smiling!
The Sword and the Arm
Now I had the production sword to work with, I could go straight to the arm.

HmmI had one idea when I started and didn't like it near the end. The angle of the sword wasn't quite right. Okay
I had done sufficient work on the tube-end of her arm that I didn't want to start over unless absolutely necessary. So I sawed her hand off to angle the wrist a bit more. There are parallels of doing this and what figure modelers do. Often a diorama needs people in it that are doing things that no available kit will give you. So you have to get something close and change it. There are many resin and commercial styrene kits that can be modified. You saw out triangles of material at elbows or knees and close them up, or conversely, add triangles in those places to move them apart. This method can achieve terrific results without having to sculpt an entire new figure.
What I am doing is slicing out a narrow triangle of material at the wrist in order to tilt the wrist up a little. Then I will go back in and fill any gaps or imperfections.
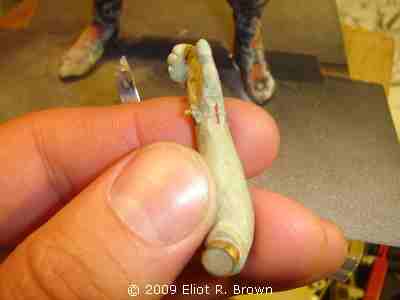
Here I've marked where I want things to be and since I started with Milliput Putty, I am fixing it with same. I think I put a small brass pin in her wrist for strength as I knew I would be sanding and shaping the wrist.

I did have to jump ahead of strict photo order to show the “correct” sword anglebut this pose is much more, “C’mon, you wanna play?” and is a lot more expressive to me.
To finish this part about the sword, I have to show the mess I made trying to make the sheath.
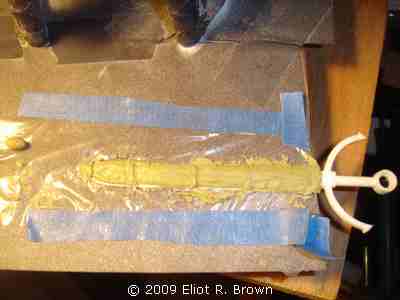
I cut out a sheath shape in styrene, laid down a sword, used Saran Wrap (food polyfilm) as a barrier and sculpted Milliput on top. This is the second try, by the way. I was quite happy for Philo to give his blessings over eliminating it!