
Sculpting and Casting a Resin Statue
Using Sculpey, Armature Wire, Acid‑Etched Brass and Rubber Molds
Chapter 6: Checking Progress and Completing the Sword
From the previous chapter:
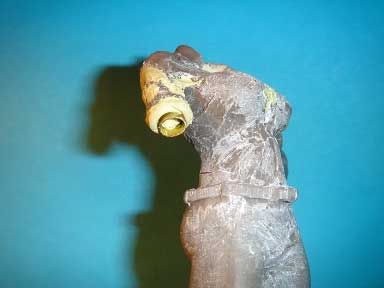
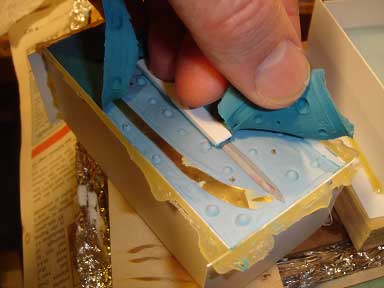
The difference between “cooked” and raw Sculpey is obvious enough. I’ve added many small wrinkles to the shirt and pants, belt and belt loops. Reference helps to see where the “drag” and “stress” of wrinkled fabric go.
Here’s the base of the sword forearm. Two short pieces of telescoping brass tube would allow the two parts to fit together and be adjustablethis is the base part. The other would be in the forearm. I used Milliput to secure the tubeit is very sticky when fresh! I made sure to neaten the inner face as best as possible.
I went on to add the folded sleeve.
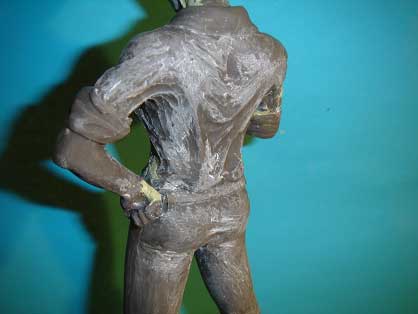
Here’s the front and mostly the back of the folds. I consulted the various reference images and poked and teased the Sclupey into shape. I hoped this looked real enough, but only the paint job would tell for sure.
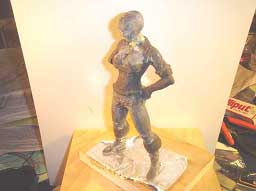
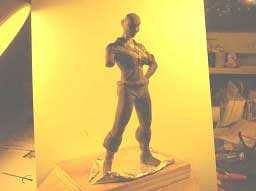
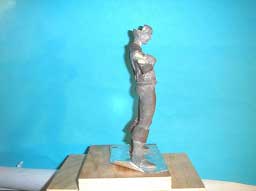
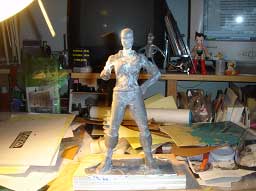
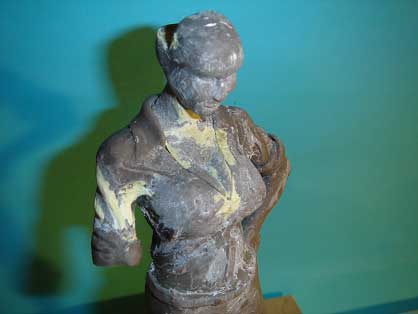
During this time, I was constantly setting her up and allowing the overall impression to sink in. I would try to put Shaundra in a new set of lights or at a new angle or, you can see, a new backgroundjust to attempt a fresh look. I needed personal assurance that I had not made some dopey blunder that would crash the project. Yes! The spirit of Astro-Boy and Bender look on with scowls and pitying smiles.
Mold Planning
A note about mold planning! All the details that are visible will have to be enclosed by mold rubber some day. So there cannot be any large voids where the rubber will flow in and rip freelike in that arm. A word of clarification here: if the rubber can makes its way into a void, gap or hole somewhere in the original, in such a way that it is unable to be pulled freethen it will tear free. What this means is that you will get a torn-end lump of some kind. One that you cannot controland at this size, control of all the shapes is critical. So at this point, one must carefully inspect for any holes that might lead to trouble and fill them. Also the boot tops needed to be simpleryou could have a neat and thin flap of “leather” but who would see it? So you simplify by closing up the gaps. If you do it intentionally and purposefully, you cannot go wrong.
Confession
Sharp-eyed modelers will see the little blue dot in the sword arm of the (much earlier) image that shows all the cast pieces. That was supposed to be a very neat hole in that arm into which a perfectly fitted shape on the sword arm itself could slip into. The rubber shape ripped free on the first cast! Luckily it was not in a job-destroying place. One can drill that hole out and slip the arm in. But it was irksome to see such careful planning go immediately down the drain. In the end, if I did not reveal this no one would have ever known. The arm goes on just fine but still I would have known!
Taking Stock
The hardest aspect of doing an everything-from-scratch job, is that it can be difficult to see which step to take next. At this point, it seemed I should address the separate arm and the sword itself.
But the sword was practically a complete model in and of itself. So I thought everything else would go on hold and I would complete the sword.
I designed the thing, I manufactured the major parts; now to assemble the master positive for molding. I saw one problem which was to exactly center the long sword blade piece exactly on the brass rod and glue them together. It had to be neat and perfect.
So I came up with a kooky sandwich of brass shim pieces that added the right thickness to the center of the brass sword piece with the brass rod in place. I placed it in a small vice and applied gap-filling super glue to what stuck out. Then I reversed it and put more glue on that end.
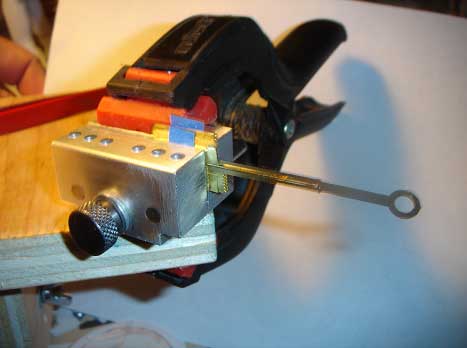
There’s material on both sides of the brass rod to keep the blade right in the middle. I had intended to solder it together, but the heat warped the brass sword piece!
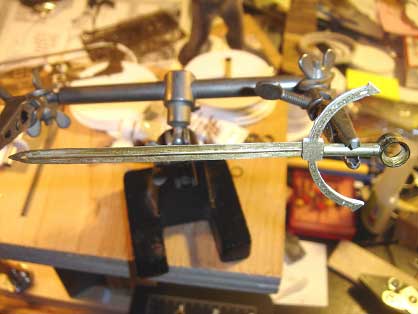
I am very proud of this as it was a real pain in the neck to engineer, make and assemble!
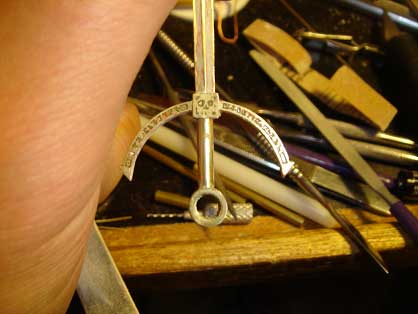
Here’s a good shot of the skull piece applied to the central square. You can also just make out the centered “lip” within the circular “soul jewel” area. You may have spotted the central hole in the part of the design that had the blade, grip and the soul jewel holder. It was purposefully made slightly smaller than the two circular pieces that were the upper and lower shapes. This inner lip would support the jewel. I was contemplating the making of a soul jewel and going to the trouble of clear-casting and tinting the thing. Luckily for me, I found a nice, already-colored jewel thing at Michael’s hobby shop!
I have settled on Micro-Mark’s “unknown” brand of casting rubber and resin. First, I tried several types of material when I had a lot more spare money and although the occasional failure was irritating, I could try another mix. The Micro-Mark materials are terrific and I highly recommend them. Their only drawback is that they are a bit priceybut not bad. What contributes to the cost is that they only sell it in 16 ounce containers.
Let’s take a minute here to talk about mold rubber. RTV rubbers were first developed for scientists who needed casts of all sorts of things. I have read that most rubbers are able to reproduce the finest details down to the cellular level. What I can see is good enough! There are several “families” of “RTV” or “room temperature vulcanizing” rubber. In the good old days, rubber could only be made by exposing the materials to extremely high temperature and pressure. Now, you stir, pour and watch a movie, done. The family aspect can be silicon type, platinum or tin cure. Even a polyester family, which I’ve heard is pretty stinky.
If you’re looking for a giant batch of mold rubber, Poly-Tek is a good supplier, their 71-20 is probably what the Micro-Mark material is (but I really do not know). Call them to buy into their “family” of compatible materials. Blowing some money on this or that rubber or resin can be an irritant, destroying your masters or molds can be heart-breaking!
(Here are the websites:
Micro-Mark: http://www.micromark.com/
Poly-Tek: http://www.polytek.com/index.php
There are other materials suppliers, but this is a good start.)
RTV rubbers are two-part, colorfully referred to as “A” and “B.” Some versions require you to do some math, for example when there is a mixing ratio of 1:10. While it’s not rocket science, it can be another level of stress while you are trying not to pour this stuff on the carpet, your clothes, the cat. Micro-Mark has selected a brand that allows you to work by equal weights. Thus, 20 grams of A can be mixed to 20 grams of Byou read it directly off of the digital scale and it couldn’t be easier. This does bring up one minor drawback to Micro-Mark’s stuff. The B is denser than the A. This means that you will have a little left over when the A is used up. They do not sell the A stuff separately.
Micro-Mark has a starting kit which is an extremely good value. Later, you can replace some of the items with much cheaper, but perfectly acceptable things. You will want a gram scale, as that is a convenient increment to work with. (There are 28.5 grams per ounce.) I have a small electronic Ohaus model that has served well for years. An example of what to replace are a box of latex gloves, craft popsicle sticks (for mixing) and smooth-sided plastic cups of different measures.
Micro-Mark sells a type of “dry gas” which is probably a can of compressed nitrogen. When you close up the bottles of stuff, make sure not to touch the can’s nozzle to any parts of the bottles! If you touch the nozzle to some of Part A and then touch it to Part B, it will cause cross-contamination! and ruination! Then you squirt this stuff in. It will force out any moist air that will degrade your stuff over time. This gas is worth it.
Because both A and B settle over time, I make use of a stirring paddle that I get from Home Depot. They, uh, give away paint stirrers. I do cut them in half so they do not displace so much material. The bottles are filled to the top!
The clay that comes with the kit is the perfect complement to the rubber, but any no-sulphur modeling clay is fine. Avoid any of the florescent bright colors, as they can transfer to the rubber or master (which is not true of the blue stuff ). The rubber and resin do not seem to stick to most anythingwhich is terrific. Even though the use of a mold-release agent is recommended, I have never used it. The rubber will stick to itselfpour new on cured and you have a new, solid piece of rubber! So the use of a rubber-to-rubber mold release is critical.
Much of mold-making is thinking like a liquid and at several stages of the process! First you have to “see” the end product, which in this case is the mold standing upright. The liquid resin is not quite as thin as water, but not bad. I do not have a vacuum system or pressure pot system that allows for the bubbles to be mechanically eliminated. But I am willing to tilt the mold during the pour and try to slosh the stuff up and then let it settle, perhaps taking tiny bubbles with it. Then I also use a straw to gently suck the resin up. If this is a quick suck, I hope it has enough violence to dislodge any bubbles that found a toe-hold. I use a long straw, by the way. I haven’t gotten any resin in my mouth (yet).

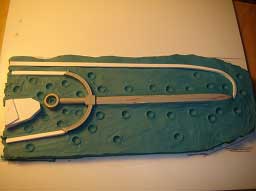
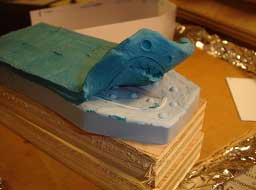
Above you can see the two halves. The dimples and corresponding bumps are called “keys.” The keys do fit like keys in a lock, so that the two halves are aligned as one. I use the bottom of a paint brush to make neat, simple indentations. Anything that yields a simple shape will do.
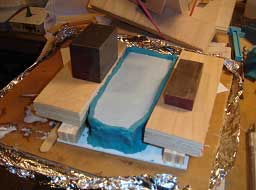
At the top, left image, you can see a blocky open shape which is where I will pour the majority of the resin. I made this out of sheet styrene, but I could have used clay. Vents are the sinuous open shapes leading from what will be the tops of the shapes. There is one large vent from the very bottom all the way to the top. This will allow resin to be drawn upward, hopefully taking bubbles through the sword with it.
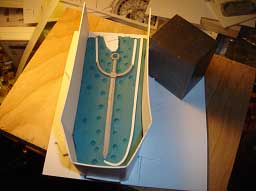
Right: the two mold halves are clamped together using backing blocks of plywood and a big rubber band with a fresh load of resin poured in it. Now you can see the “blocky open shape” as a hole. You can see a straw to one side. But I am showing all these big steps with such small pictures because ultimately, the mold was good, but the resulting resin sword was too flimsy! When I took the mold apart, it dragged the sword with it, bending the sword. The bottom vent was not good enough, which meant I had to try again and do that part better. Plan B I will need a Plan B
Plan B! I needed to improve the straw holes, the bottom of the blade needed a better vent for the resin to both get into the very bottom as well as allow resin to rise to the top, finally, the stiffener! I made a quick little shape of bent and soldered brass rod. This would be placed into the clay at this stagejust the little tips of the bent rod. Then the rubber would be poured around it. This would make the one side very rigid, thus allowing the thin and flimsy side to be pulled away, but keeping the cast sword stable.
Of note is the fact that I used a small hex wrench in the clay in the soul jewel hole, this made a nice key for the rubber to get into and lock the two mold halves together right there!
So, yes, I had to make a completely new mold. This is the dedication to the craft that teaches one patience. Plus it’s fun to work up new strings of curses!
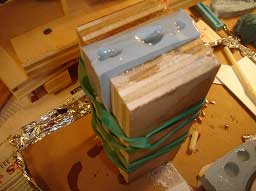
Here’s the mid-way point of a two-part mold. Below you can see the little brass feet sticking out of the first pour rubber. I used a thick slab of styrene to support the sword master while I was tapping it into the clay. I did not want it to shift. There is a small flap of rubber that went “under” the brass vent. This I will trim away with a sharp knife and tweezers. You can see I made a mold box out of sheet styrene. While I have a lot of that, it is a good material to use as nothing in this process sticks to it. The yellow gunk is hot-melt glue, which can be pulled off cleanly.
I am going to brush on a light layer of the rubber-to-rubber mold release. The instructions tell you to blot out any excess that pool in crevasses.
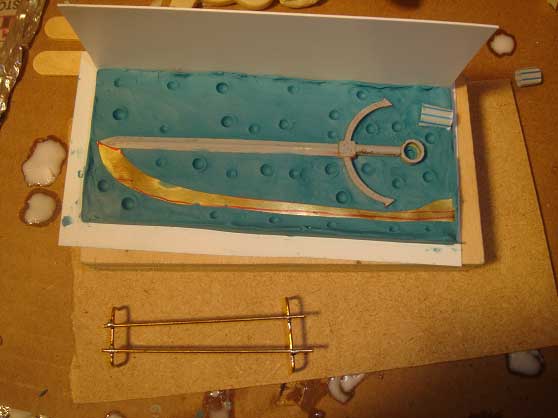
This is the second cast sword. I thought it would be smart to place a thin brass rod in the blade of the sword for extra rigidity. The first try was a simple straight piece of brass. Which, of course, slid right down to the bottom of the sword “hole” and the resin poured in and revealed it to be crooked! To solve that problem, I curled the end of the rod and “hung it” up in the soul jewel area. This way, it was much neater and centered. You can just make out a shiny central area in the blade. You can see in the big vent, where I didn’t suck hard enough to get the bubble all the way out! But still off the part. After I cast both halves, I went in with a fresh #11 blade and cut “V” channels from the very ends of the upper parts of the curved pommels.
Here’s where you have to think like the modeler who will be handling the rough part. If you place the vent right at the apex of the little “barb” shape, no air bubbles can get trapped. Keep the vent stub right on the small face and it can easily be sanded flat!