Sculpting and Casting a Resin Statue
Using Sculpey, Armature Wire, Acid‑Etched Brass and Rubber Molds
Chapter 5: “Cooking” Sculpey In A Slow Oven
From the previous chapter:
Printed circuit boards are a close cousin to brass etching. I make use of their method to make circuit boards in one batch and then etched brass in the next. Once familiar, it is very simple to do.
Ignore the instructions! Perez* has it right!
I had gotten the body to about where she should be. I was still blundering around with the clothed proportionsbut there were no clothes yet. Plus these would be “skin tight.” So I left the body almost appearing “nude.”
Into the oven!
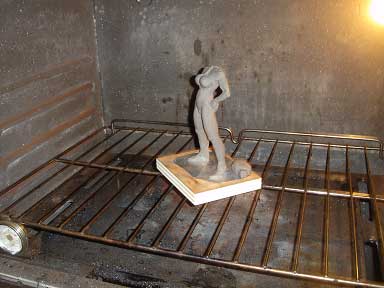
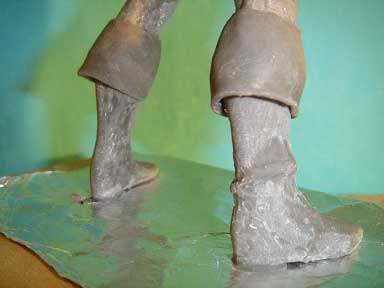
(Note: this oven specially cleaned for this purposeat all other times, it is blasted grease and grime everywhere.) The oven is set to “Warm” and the sculpt is set in it for about an hour. Came out perfectly nice. You may note a piece of aluminum foil placed under the feet. I am not sure this is necessary, but y’know, I was there I had the foil
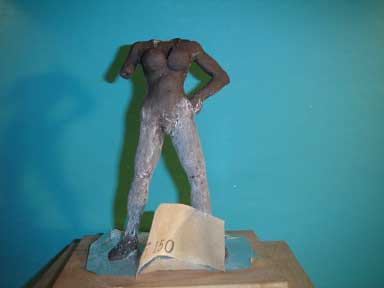
Now to smooth off the slight lumps and bumps. I did all of this step with ordinary 150 grit sandpaper.
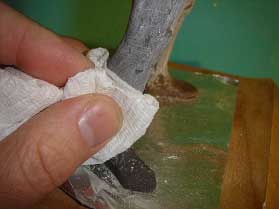
I did a “poor man’s polish” with some dampened paper towel. Just enough to pick up the powder left behind by the sandpaper. None of this needed to be terribly good because over these shapes, I would apply clothing details.
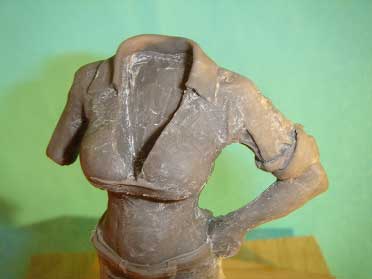
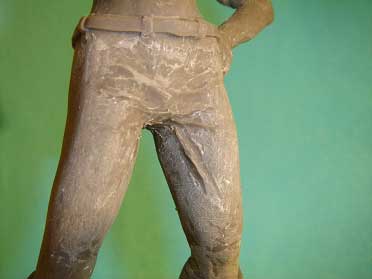
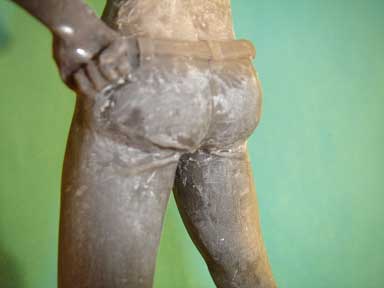
The difference between “cooked” and raw Sculpey is obvious enough. I've added many small wrinkles to the shirt and pants, belt and belt loops. Reference helps to see where the “drag” and “stress” of wrinkled fabric goes. Also, I think the use of reference was especially helpful. In the butt and crotch areas, you can see the coarse material stretching to suggest reality and movement, but also (hopefully) to show the body underneath.
You can also see where I added a very small boot heel. The comic art showed a very small one, but also, simple and low heels were what was common some 1,000-1,300 years ago. It also shows that I could remove and replace the armature into the fairly tight-fitting holesthey were drilled so that they fit the angle of wire and would not stress the legs in the process.
All these additions had to be cooked again. This is quite easy to do with Sculpey. Once I got the major “dressed body” finished I would move away from Sculpey and take to Milliput Putty and other finishing putties. This was because I was in the finishing stage. Yes, you can “finish” Sculpey, but I would be covering relatively large and thin areas, which I do not trust Sculpey to do as well as the other stuff.
*Dan Perez of Dan Perez Studios

> > Next — Chapter 6: Checking Progress and Completing the Sword