How I Modeled The Knight Bus from Harry Potter and The Prisoner Of Azkeban
Using Wood Carving, Vacuum Forming, Plastic Shaping, Painting, Special Building Jigs, Model‑Making and Custom Appliques
Chapter 2: Carving the Pattern To Be Vacuum Formed Out of Wood
From the previous chapter:
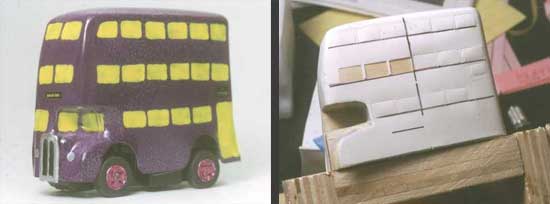
… I pulled enough proportions out of the photograph to sketch the distinctive window pattern of the bus profile.
I carved a wood pattern of the Knight Bus to be vacuum formed. If you're not familiar with vacuum forming you can read about it if you click here
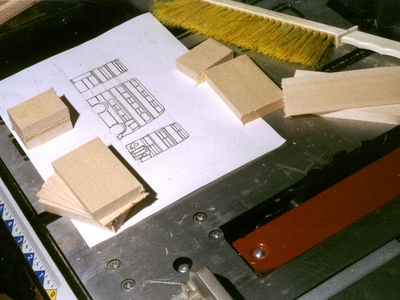
First, using standard thickness blocks and spacers of basswood from Micro-Mark, I layed up the wood to reach the correct thickness of the bus placing them against the 1:1 drawings. At this point I glued everything together, making a large block that was the right thickness for the bus. I used a great big table-saw to cut them to size — though a hobby razor-saw would do fine. When I reached the right thickness, I trimmed the sides and tops. Here is where I started thinking about the distinctive window indentation next to the driver.
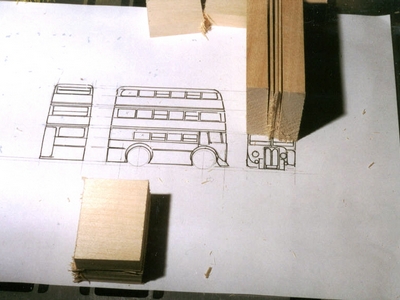
The photo above shows the three-view drawing along with solid basswood pieces laid out to the right sizes.
I then spent some time figuring out the one aspect that worried me about vacuum forming this shape. I really wanted the driver’s indentation in the shape. But that meant a severe plastic forming undercut at that spot. With such an undercut, I'd have trouble pulling the wood pattern away from the formed plastic. The first thing that hit me was that the pattern needed to be made in two parts. While the giant indentation locked the front end of the bus into the plastic form, I could slip out the back end.
Here’s the indentation:
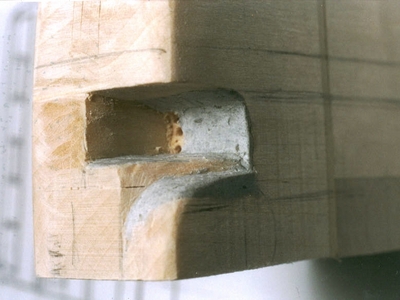
It’s been touched up with a little quick-setting plumber’s epoxy putty.
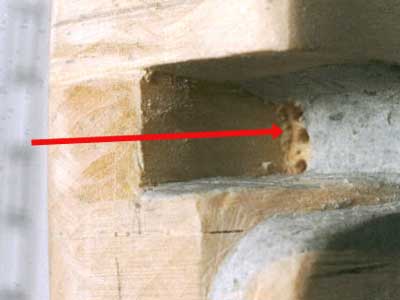
The arrow points to the start of the vent holes that I drilled so that the vacuum can reach into this area. Will there be enough “suckage?” At this point, I didn't know.
Here are the two halves. They will be joined and then separated using a sheet-rock screw.

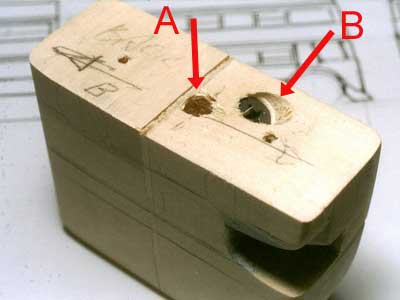
Above: Here are the two pieces assembled — with the screw in place. The larger hole (arrow A) is the one that connects to the vent hole in the driver’s indentation area.
I used a countersink bit for the angled hole (arrow B) to accept the longish sheet-rock screw so that the screw head would sit flush to the bottom of the pattern.
I knew I would need a clean lower edge, so — see below — I built two risers out of plywood. One to fit the base and the other a beveled edge riser. To saw out the beveled edge riser I traced a line to follow and then I tilted the blade of a very noisy jig-saw to 45° and made the cut free-hand. There was a lot of nerve-wracking vibration as the piece dropped out of its hole... I recommend ear protection as well as eye!

Above you can see the two halves of the pattern with the risers. The bigger holes on the risers (where the arrows are pointing) are for the vent connections to the vacuum table surface.