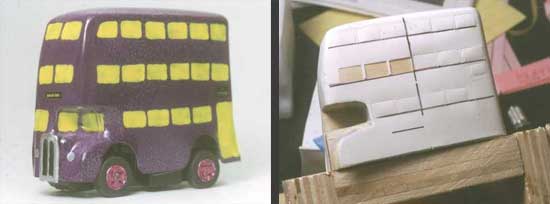
How I Modeled The Knight Bus from Harry Potter and The Prisoner Of Azkeban
Using Wood Carving, Vacuum Forming, Plastic Shaping, Painting, Special Building Jigs, Model‑Making and Custom Appliques
Chapter 3: Vacuum Forming — Trial, Error and Success
From the previous chapter:
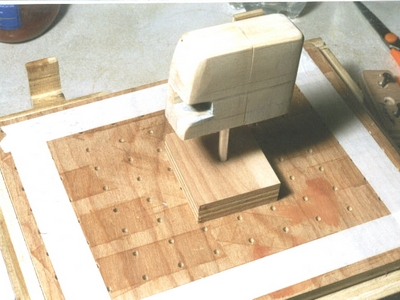
I carved a wood pattern of the Knight Bus to be vacuum formed.
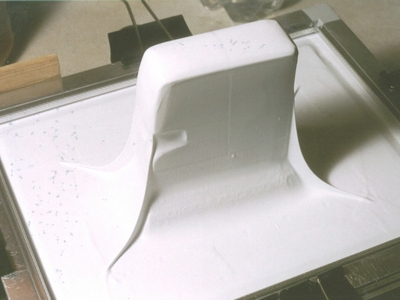
It was time for a vacuum forming session. I selected some .030” styrene. I had used the risers to elevate the pattern because I knew there would be some webbing...
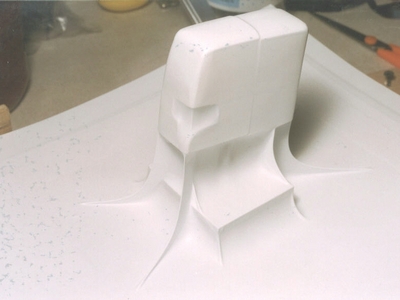
Webbing’ is when the plastic is asked to stretch or wrap itself too far. You can see a fine example of webbing in the pic below. The heated plastic — which acts like limp balloon rubber — will at first stretch nicely between the pattern’s top and the frame. Then it is pulled down by the vacuum so that it “travels” all the way down the side of the pattern and then along the table top. This, together, adds up to a greater distance than that first, straight stretch. At this point, any of you mathematically-inclined might see an ordinary right triangle. The length of the two sides of the triangle are greater than the length of the hypotenuse.
The webbing shows up where it does, at the corners, because the distance from the corner of the pattern to the corner of the vac-forming table is greater than the distance from the middle of the pattern to the middle of the table. In other words, the corners are where the greatest demands are made on the plastic to stretch the furthest. Often, it just won't do it!
From the previous chapter:
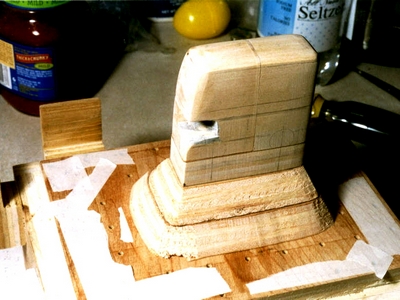
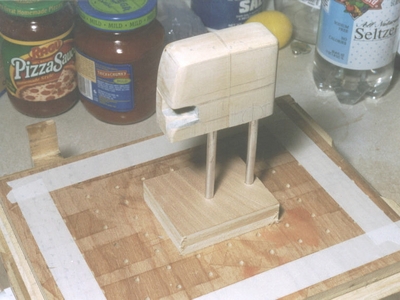
I built two risers out of plywood. One to fit the base and the other a beveled edge riser.
I created the beveled, 45° angle riser to give the plastic an easier transition from that diagonal dimension to the table top. For small objects it works well. For something like the Knight Bus, which is very tall and thin, not so well.
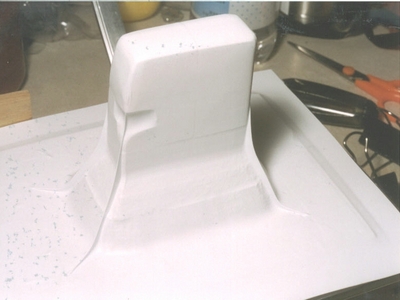
Look at that useless mess! Yeeeoww-eewww...
There was not enough suckage to get the driver’s indentation either. Oh well, one problem at a time.
So, if one beveled riser is not enough, then how about two?
In this pic you can see the risers — no need to finish them — and the vacuum forming table top. I use masking tape to close off unnecessary vacuum holes. Not only to increase the power of the vacuum to the “area of influence” but also to leave a little suckage for the driver’s indentation.
Now will two risers work?
Hmmm. Better, but not good enough. A third beveled riser... No; I needed a better way — ah! Eliminate the risers altogether.
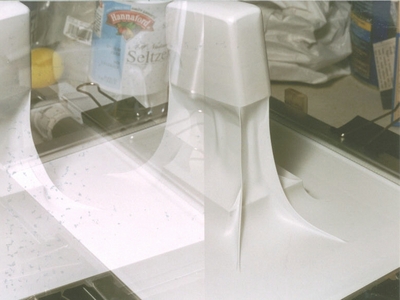
This time I believed that I must have solved the indentation suckage problem by directly hooking up the vacuum to the vent hole! Clever, huh?
Well... no. There was no drivers side indentation worth mentioning. But, the body shape is formed! I needed to stabilize the two halves of the pattern so I built in another brass support.
You may note that I elevated the pattern a little more. This is a questions I get a lot, what height can you form to? The answer really involves the overall shape — but you can see that 7”+ can be easily dealt with.
This picture shows that I am using a manual, old-fashioned film camera. I ripped the sprocket holes on this last film advance...
...making a nice double exposure! But you can see the successful form.